

I thought maybe I would get down to the wood and find something nice - what I found instead was layer upon layer of oil paint (some possibly lead based considering age) with ho-hum wood underneath. Then I found love in a hopeless place (loves me some RiRi). I took comfort in the look of Scandinavian painted floors:
 |
| Source: Fry Dog Design |
 |
| Source: Country Living |
 |
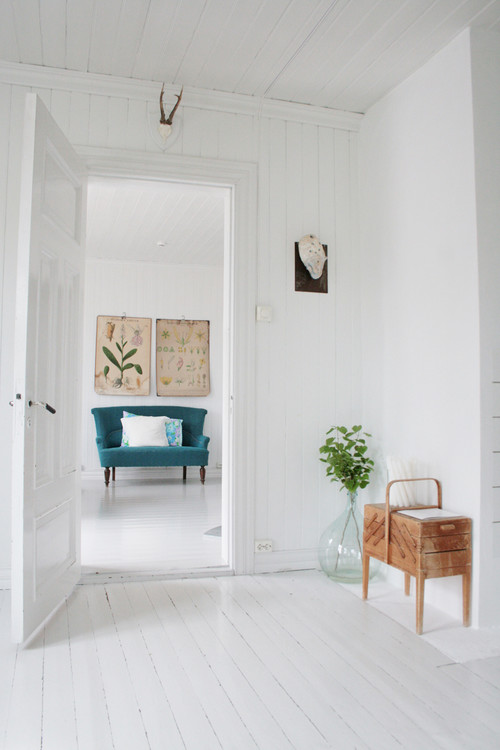
| Source: House to Home Blog |
I started by vacuuming like a madwoman and cleaning with floor with a simple water and vinegar mixture. Then I moved onto de-glossing the floor. I had considered priming but after looking into high-adhesion paints, I considered I would attempt this step first. You can buy de-glosser or TSP at any hardware store. I settled on a brand from a Canadian store, Home Hardware. Within minutes, my floor went from high gloss to a dull, matte finish. I was impressed! Here's the stuff:

I get all my paint colors matched to Benjamin Moore for the most part, but this time I went with CIL's Silver Quill. It was a good pick since it didn't appear to have any strong undertones of other colors. Plus, it's light but not quite white. Perfect for that Scandinavian look.
My dad and I tackled this project in two days. Making sure this stuff is dry before laying on the second coat is key to avoiding a mess and brush strokes. Having never worked with floor paint before, I was surprised how thin it was - the brush strokes disappeared. Given the floor has lots of little nooks and crannies, we avoided brush rollers and went with bristle instead. Here's paps giving me a hand...
 The results were drool-worthy. I knew the navy was making the room look drab but the new flooring made the room glow. But hold up! Refrain from prancing around on this new floor like a little child. This baby had to cure so we slept in the spare room for about a week. By then, the fumes were gone as well.
 We've had this floor in commission for a few months now and we've yet to have any major chipping or peeling. My only lesson learned was to lift furniture rather than drag it and to put protectors on the legs of our bed. Other than that, this baby is a breeze. Surprisingly, it hides pupper's dog hair like magic. I knew lighter floors showed less dust and such, but I didn't realize how well!
Over the next week, I'll post photos of the master bedroom decor in progress. We're in a good way and it's very cozy - but I'm looking for wall art inspiration to seal the deal.


Over the next week, I'll post photos of the master bedroom decor in progress. We're in a good way and it's very cozy - but I'm looking for wall art inspiration to seal the deal.


0 comments: